Nymph or Dry – A small stream decision.

Before the first cast comes the decision: which type of fly, nymph or dry? Logically, you could choose either, or both (and yes, I know there are also streamers, but it is a rare choice, so let’s not complicate things). This decision is often driven by the angler’s preference, predilection, fanaticism, or the latest magazine infomercial. I have tried to put my prejudices aside to give you an approach that will give you a choice that may improve your chance of success.

I consider the following questions:

  1. Are the trout rising?
  2. What food sources are available and abundant?
  3. Where is the trout likely to be holding?

Are the trout rising?

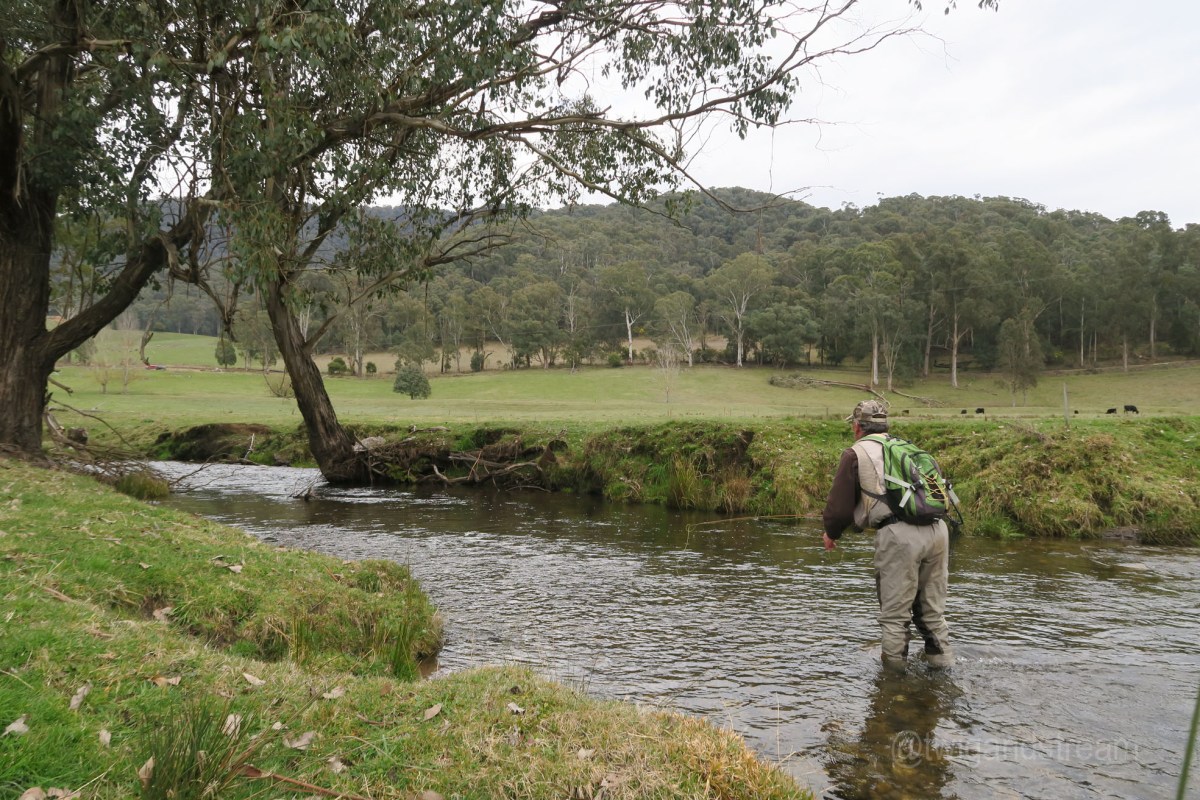
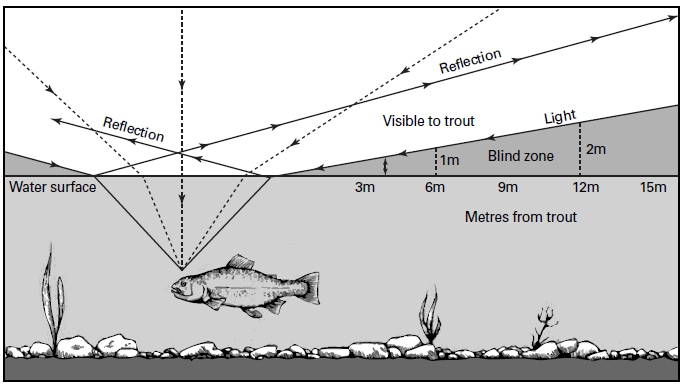
This is why it pays to stop and watch the water before you fish. If you can observe a trout rising, it gives away its location and a likely way to fool it.

When a fish is rising , it means the trout is looking up for a meal, and often means the trout is sitting mid water or higher. In this situation it is important that you fly be above the trout’s holding level, a dry, a lightly weighted nymph on a greased leader or a dry with a nymph on the dropper ( up to 60 cm) are all options.

A heavy nymph on a long leader is likely to drop below the level of this trout and therefore drift by unnoticed and untouched.

What food sources are available and abundant?

According to many reliable sources, most of a trout’s diet consists of sub-aquatic insects. Some say it is as high as 70%. In New Zealand rivers, this is often much higher. A nymph will generally take a trout all year round but may not be the best choice on a given day.

Certainly, the insects we imitate with dry flies are not abundant year-round, and typically early season and very late season there are very few species that are in sufficient abundance to suggest imitating them is the best option to fool a trout.

In the warmer months, November through to March, here in Victoria, terrestrial insects are abundant, as are hatches of sub aquatic insects. A single dry fly is great first choice at this time of year; however, you can also choose a lightly weighted nymph or a nymph dry dropper. Recent rain will lift the water levels, and releasing more nymphs, so as the water drops to a fishable level, the trout can be focussed on nymphs and reluctant to rise.

Very early season Sept/October and late season May/June, the cooler weather and higher flows means very terrestrial few insects about and little or no surface feeding. While catching a trout on a dry fly is not impossible it is highly improbable, and the weighted nymph will be your best choice.

Where is the trout likely to be holding?

Trout hold position , facing up stream, where the force of the current is low. This enables them to minimise their energy expenditure while watching for passing food.

Fast water

In sections of the stream where the water is flowing quickly, trout are likely to be found in the lee of a boulder or mid-stream obstruction, hard up against the bank or right on the bottom. All these positions will have protection from the main current.

Slow pools and runs

In the slower pools and runs the trout may hold position to feed or patrol a beat searching for food.

Deep Water

In deep (over 1 metre) fast flowing sections, the trout will often be on the bottom, and will be hard to tempt with a dry fly. It takes a lot of energy to swim up to the top, then back down again, so it needs to be worth it for the trout. A big hopper will sometimes pull a large trout up from the deep. However, a better option is to fish a weighted nymph under an indicator on a long dropper that drifts just above the riverbed.

where the bubble line flows hard against the bank, or a log, the trout will be holding and feeding there, and a fly drifted within a few inches of the bank will be pounced on. Trying to fish a weighted nymph, or a dry dropper hard up against the bank is supremely difficult, and usually end up either drifting too far from the bank , or snagged up. If it is a smooth rock wall it is possible to hit the wall with nymph and indicator and let it slide straight down. A successful technique I discovered by accident on a pool on the Crooked River. A better option is a single dry fly (if the time of year is right), as an accurate cast within six inches of the bank is easier to achieve.

Midstream boulders can be targeted by drifting or swinging a heavy nymph drifted close by. Another option is to land a dry fly in the dead point above or below the boulder with a slack line presentation, so it pauses a few precious seconds to entice a take.

In the deep slow pools, the trout could be anywhere: deep on the bottom, or up on the surface feeding. If the water is over a metre deep, unless the trout are visibly feeding, a nymph is most likely to be productive, however in the warmer months a dry fly drifted in the bubble line is a better first choice, and if unsuccessful, you can always try a deep nymph subsequently.

Mid Depth Water

Any water between fifty centimetres and a metre deep is good holding water that allows a trout to feed easily anywhere from the bottom to the surface, however in the quicker water, the trout will need some protection from the current. At the right time of year, the trout will rise from the bottom to take the dry. A good first choice for any time of the season, is a dry dropper combination. Early and late season the weighted nymph should be first choice, and in the warmer months a dry fly is often best.

Shallow Fast Water

Trout, especially rainbow trout, like to feed in fast shallow broken water: there is food, oxygen and cover. In warmer weather this is a good area to target with the dry, or a nymph on a short dropper under an indicator/dry fly. Within this water the trout are often able to hold in hollows and depressions, or between small boulders. the quieter pockets are worth targeting in the same manner.

Often overlooked, slow shallow water can hold some surprising fish, especially if there is nearby cover or bolt hole. Given a nymph is likely to get snagged on the bottom, your best choice here is a dry fly. An alternate option is an unweighted nymph on a greased leader.

Summary

Depending on the time of year, and water speed and depth, sometimes there is a superior choice, however often not so important, and your choice may boil down to your personal preference. I have included a table and a legend below to give you a guide. Note upper case means the choice should be a primary one, lower case , means it is a secondary option you might also consider.

MonthDeep > 1mMid (0.5 to 1m)Shallow (<0.5m)
SepNWNW,dnNU
OctNWNW,dn,d,nuNU,d
NovNW,D,DNNW,DN,D,NUNU,D
DecNW,D,dnDN,D,NUnu,D
JanNW,D,dnDN,D,NUnu,D
FebNW,D,dnDN,D,NUnu,D
MarNW,D,dnDN,D,NUnu,D
AprNW,dNW,DN,D,NUNU,D
MayNWNW,dn,d,nuNU,d
JunNWNW,dnNU
Fly Choice by Month and Water Depth

Weighted NymphNW,nw
Unweighted NymphNU,nu
Dry Nymph ComboDN,dn
DryD,d
Fly Type Legend

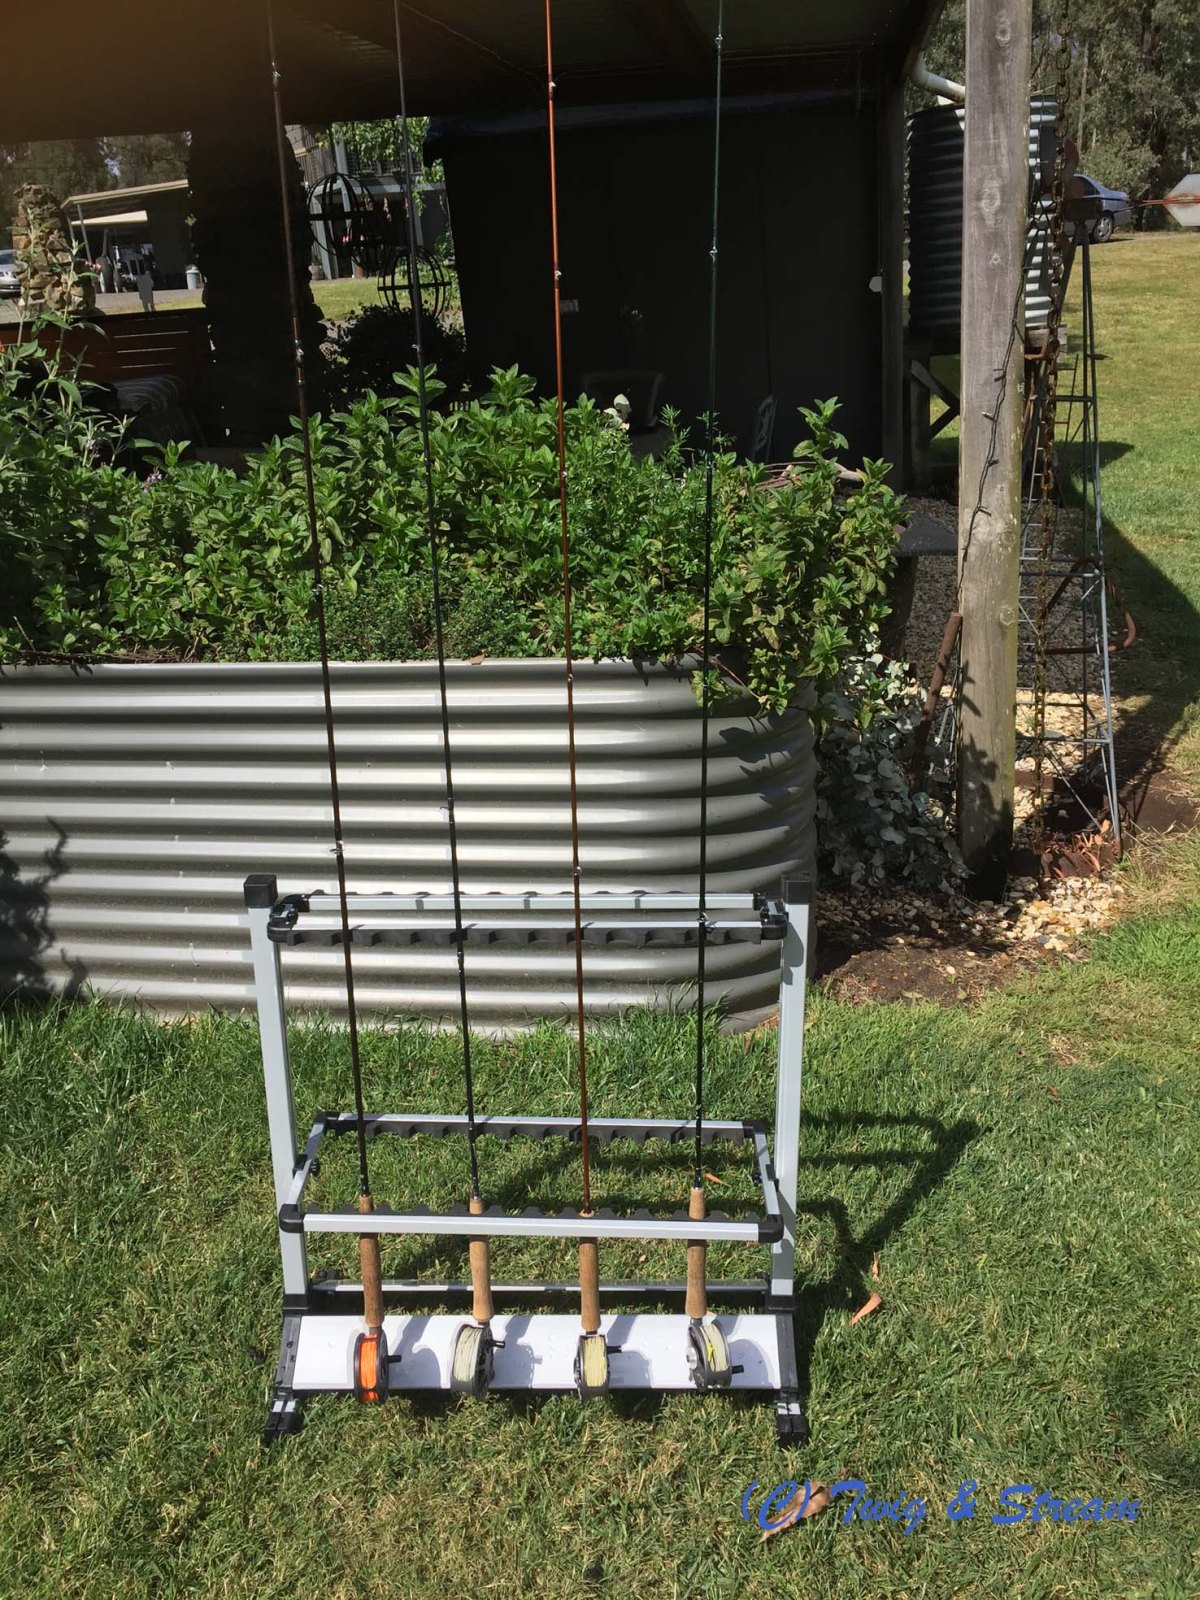
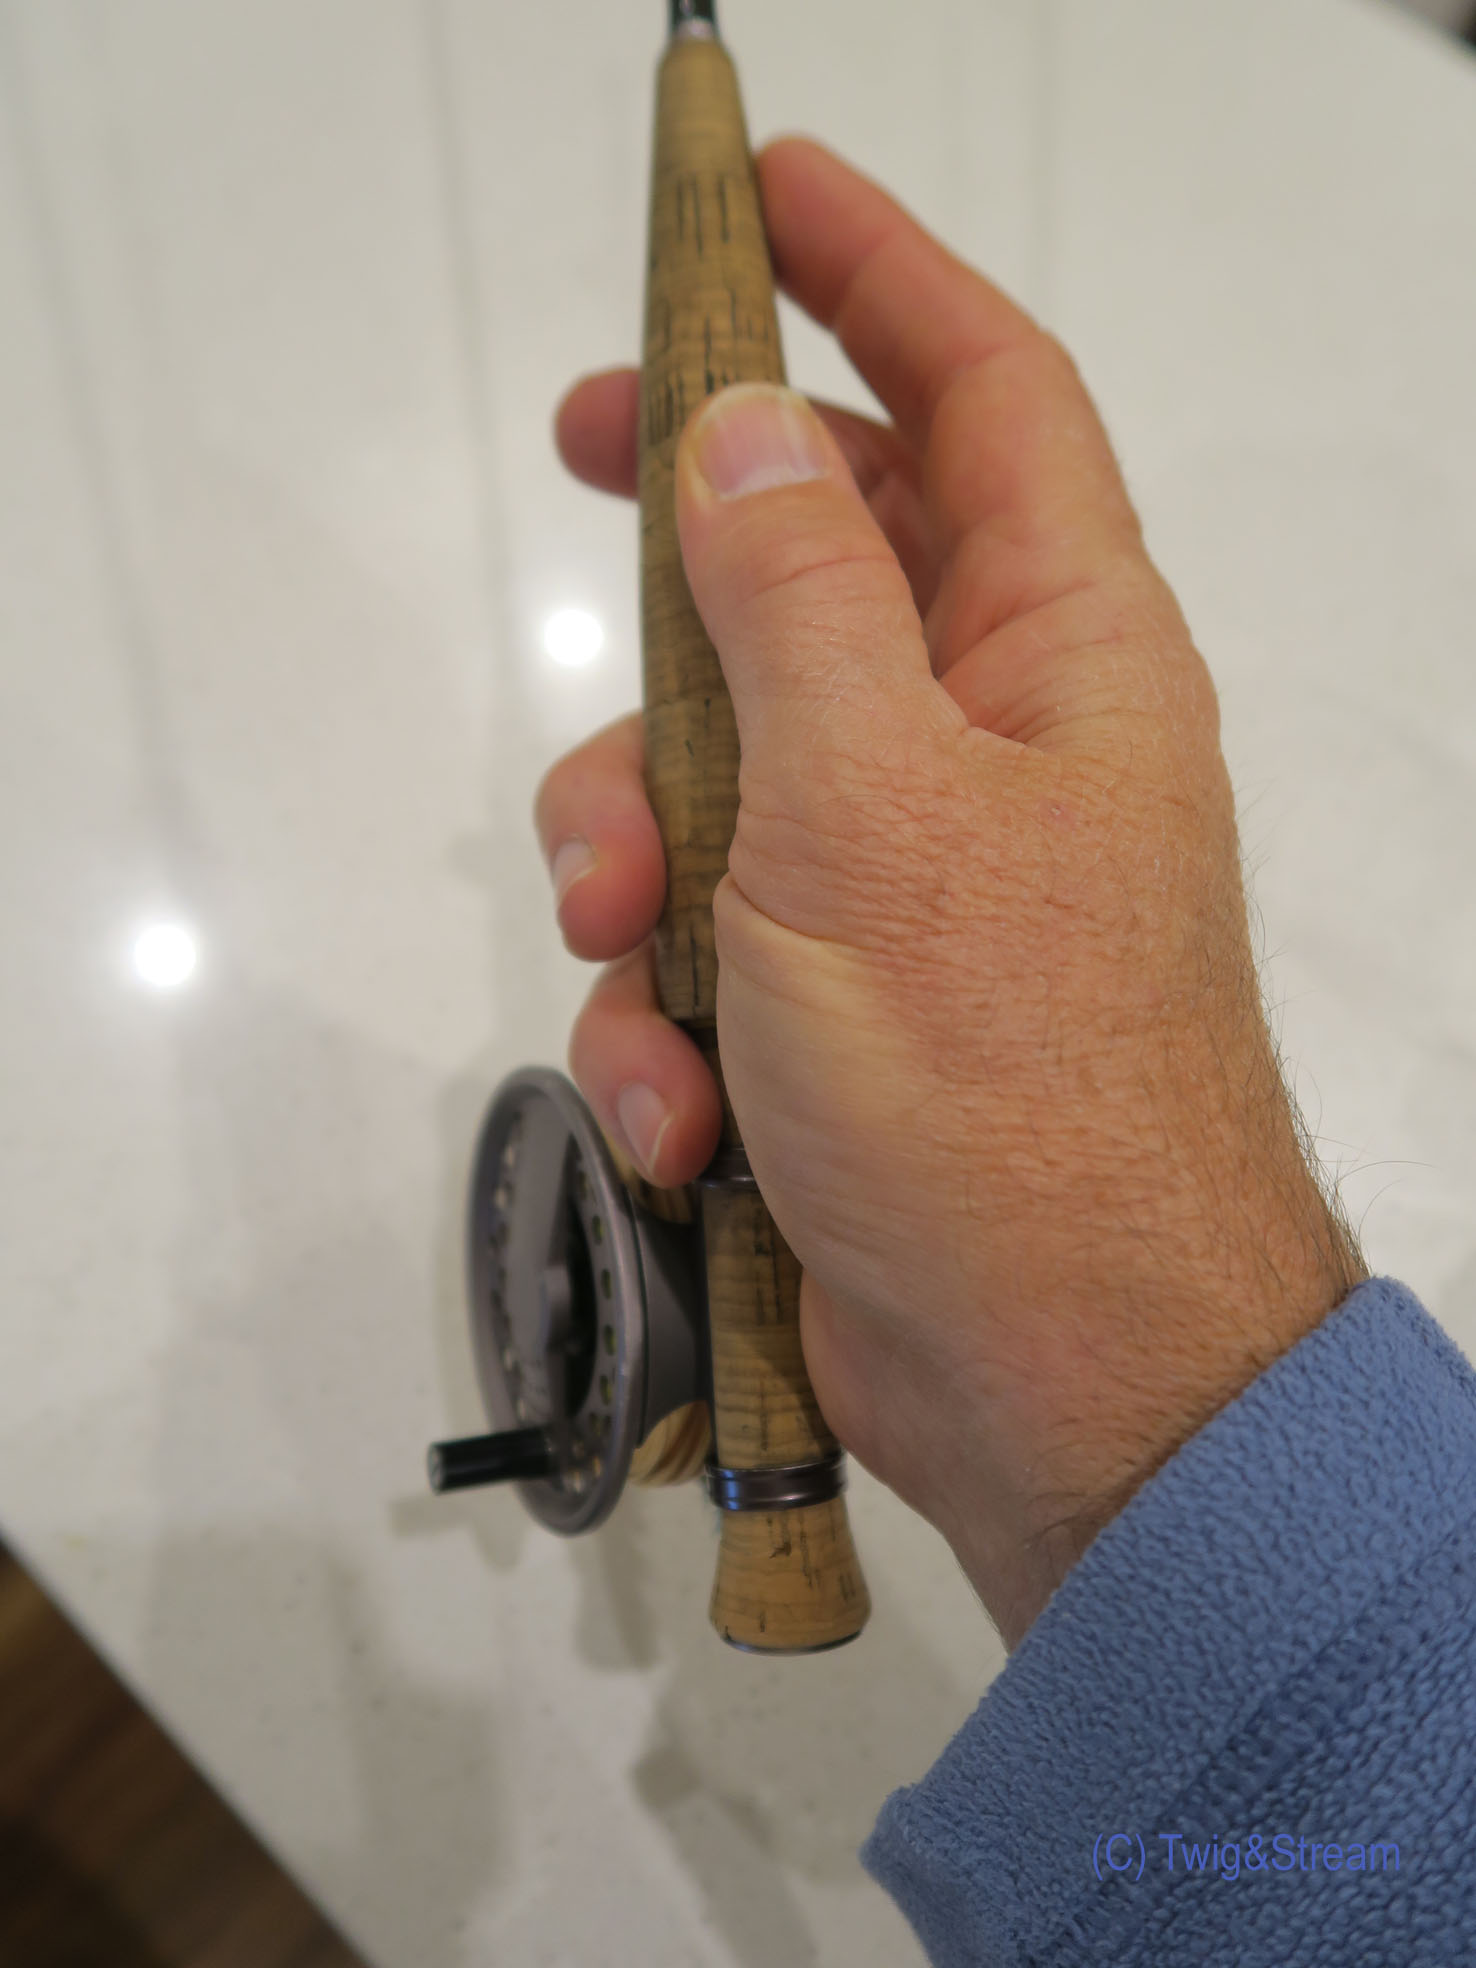
At one stage, I used to fish almost predominantly the nymph. In warmer months a dry with a nymph dropper, and only fish the dry, when the trout stopped taking the nymph. These days my first preference is to fish the dry, where the time of year and water allows it. Where there is good holding water and the nymph is a better choice, I will swap over. I prefer to fish a single fly for simplicity, trusting in my choice. To that end I carry two reels, one rigged with a line and leader for dry, and the other with a line and leader for nymphing. I find it easier to swap reels over than meddle with leaders, especially if I need to swap back and forth as I progress along the stream.

Feel free to share your thoughts in the comments.

Lessons ? Practise ? Why bother?

“Why bother with lessons and practise? I cast well enough to catch fish nearly every time I go out ?”. This was my response some 15 years ago, when a fishing mate suggested we share a lesson.  Proud of my skills back then,  I couldn’t see the sense in standing in a park making the same cast after cast, endlessly, monotonously.  Especially when I spent most of my time fishing streams and rivers.  My older wiser self, would now side with my mate on this one, and has a few answers to that question.  However I am not sure my younger self would have listened or understood.

I have no idea what his response was, but I remember being sceptical, and it was probably only the promise to go fishing afterwards that finally convinced me to join him.  I remember it was a very windy day, the coach was an experienced angler and had me working on getting rid of the tailing loops that annoyingly and reliably appeared every time I strived for distance. I still remember his sage advice (and his Sage advice), “try not to grip and rip, try to feel the cast”.  When I asked him how , he suggested I try a rod with a more forgiving action.  I tried his Sage SLT 5 weight, I loved it.  It did help, but I still didn’t understand how to develop feel. Also, whilst I am certain this was not his intention,  I took this to mean a new rod would make me cast better. It didn’t.  (Good rod though, glad I bought it, glad I still have it !). Sadly (for me), I didn’t pursue any more lessons with him or anyone else, and forgot about it for a while, enjoying myself nonetheless.

Why I finally took lessons

Five years on, and I was living in London,  trying to learn Italian, and on advice from my language teacher, I took to reading websites in Italian, on something that interested me (fly fishing unsurprisingly).  In this way, one spring day, whilst on vacation,  I found myself fishing on one of the rivers in Umbria in central Italy with some guys from the SIM Italian fishing association.  The river was fast and clear, and I had some great success fishing weighted nymphs.  One of my hosts suggested I try casting a dry near the far bank, where he claimed there were some big ones hiding under the overhanging shrubs.  I probably put at least 50 or more casts over there, landing the dry in the current seam, only to have it whipped away by the current.  At this point I declared, that :

  1. Clearly there were no fish there, and
  2. Even if they were there it was impossible to fish the spot, the drag was horrendous.

My host, didn’t seem fazed and made a leisurely cast across the current, his fly landed, and sat… and sat…. for at least a count of 3, before a sizeable hole opened up beneath it.  A relaxed lift of the rod, and the hook was set into the biggest fish I’d seen all day.  He did it twice more to prove it wasn’t a fluke.  He presented that dry-fly with studied precision, and injected just enough slack in the leader to let it hang enticingly in the still water. I begged him to tell me how he did it. Easy , he said, come to a course, and you can learn. Here was an art, and an art worth my learning (sorry for misquoting Mr Walton). I now had an  answer to that question of a few years before. Why take some lessons: to learn some skills to catch fish, good fish, that I otherwise couldn’t !

It was through the Italian SIM association I learned there was a whole lot more to fly-casting and fly fishing than laying a line out straight and accurately. Their approach to fly-casting is all about casts that catch fish, controlling the line, leader and fly to present the fly, in and around and under obstacles, combatting swirling currents to maximise the natural drift. Over the next few years I attended 6 or so courses, improving bit by bit, discovering the joy of playing around with rod and line.  Even more so on the river, where there is a lot of satisfaction to be had making a difficult cast, even better if a fish cooperates.  Another answer to my question : Have more fun!

How to Practise

None of this came without practising between the courses.  Not just any practice either, what is needed is focused practice. For example, when I was on a golfing crusade to earn a single figure handicap. I used to hit a bucket of balls at the driving range twice a week thinking this would really help, until a conversation with my golf-pro. He asked me how I practised, “I take my driver twice a week at the range” I said. “Hmm” he replied, “you drive quite well, but what about the rest of your game? Chips, putts ? fades ? draws ? High shots low shots ? Practise the shots you use most on the course. Spend half your time on your short game, half the rest on the short irons, and then rest on long irons and woods.” Good advice , practice the skills you need!

I advocate applying this approach to fly-casting. In the off-season I practise at least once a week for an hour or two at a time.  I make a rough plan for each session , I go with the intention of working on a four or five skills in particular. I break up my practice time and spend no more than 10 – 15 minutes on each skill.

Don’t be afraid to take a few lessons.  If you are in Melbourne we have casting lessons available. Click here.

Try it for yourself: you may catch more fish and may have more fun doing so!

Practise Drills for Fly Casting:

Loops and line control:

  1. Loop control : Try making false casts with consistent smooth loops. 3 or 4 casts then rest. Try doing this at different distances.
  2. Loop size: Practice casting tight loops, medium-sized loops, wide loops.
  3. Rod plane: try casting on various rod planes. from vertical, to horizontal and angles between. Concentrate on timing and making clean smooth loops.
  4. Double hauling.

Presentation Casts:

If you have learned how to do these, practice and perfect them, if not consider hitting me up for a lesson or three:

  1. Curved casts
  2. Wiggle casts
  3. Bucket Casts
  4. Aerial Mends

Accuracy:

  1. Simple accuracy I take a few hoops or targets with me, and set them up at various typical fishing distances, and practice a few casts at each , then try the next one, trying always to judge the distance by eye. I move around so the distance is never the same.  On the river you don’t know the distance in advance!
  2. Altering the plane: e.g. Side casting to a target, simulating casting low under overhanging foliage , yet still hitting the target.
  3. Presentation cast accuracy (curve, bucket, wiggle) : Using a hoop, I imagine that I need to make a presentation cast to some slack water, the loop is the target.
  4. Reverse cast (over your other shoulder)
  5. Other hand if you know how


On Water:

If you have suitable water nearby, try practising:

  1. Roll casts (and single-handed spey techniques )
  2. Mending
  3. Different presentations ( fly first, gentle)
  4. Different retrieve patterns (etc.)

Here are a couple of videos from my practice sessions

Choosing a Fly Rod for Beginners

The fly rod is probably the most important item of your equipment and is generally the most expensive. But as it can influence your first few years of fly fishing in either a positive or negative way it is important to make a good choice. Whilst most reputable fly shops will give you good advice, it is best to go in well informed.

Firstly know:

  • What you are fishing for,
  • Where you will fish
  • How much money you have to spend

Now all you need to pick is a rod that

  • matches what, where and how you fish (rod weight and length),
  • is the best quality within your budget
  • has an action that suits you,

Rod Weight

You need to choose a rod weight suitable for the type of fishing you will do.  Rods are given a number that signifies the line weight the rod manufacturer recommends.  Line weights start at 1 weight, and progress incrementally through to 14 weight, the smaller the number the lighter the rod. Your choice should be based on the size, power and weight of fish you intend to target.  The bigger the fish, the more powerful the rod (and heavier the line weight)  required.

Fish Size/Species Rod Weights
Small stream trout #1 – #5
River trout #4 – #7
Large freshwater fish (Rivers/Lakes e.g. Steelhead, Carp, salmon or Cod or Smaller Saltwater Species – Kawhai/Barramundi/Bonefish #6 – #10
Larger Saltwater Species – Queenfish/Giant Trevally/Sharks #9 – #14

Rod Length

Rods come in a range of lengths to suit a range of applications, but a generally the further you need to cast, the longer the rod. A rough guide follows:

Application Length
Small Streams 7 – 8 ft
Rivers 8 – 9 ft
Lakes/Saltwater 9 – 10 ft

Specialist applications will require specific lengths/weights (e.g. Euro nymphing uses long light rods).

Price and Quality

Rods come in a range of prices and quality.  You could spend as little as $60 or as much as $1200 on a fly rod. While price is not a guarantee of quality, you generally will get what you pay for.

The premium rod brands, spend a lot of time and money on research and rod development.  Generally their rod blanks  have the latest technology, are stronger and lighter.  They usually have very good warranties –  some are even lifetime warranties – and they will generally repair or replace our rod for a small fee.

There is quality in the the components that are used to make the rod, the cork in the grip, the reel seat, and the line guides. How evenly and evenly and finely the thread that holds the guides is wrapped, is also another indicator of quality.  On the cheaper end of the market, you get some poorly designed or made rod blanks. These may cast poorly and often break too easily.You can see the varying quality in the photos below.

How much should you spend ? You can spend anything up to $1200 AUD to buy a rod, but you do not have to do so to get a quality fishing rod that suits you. Nearly every rod that retails under $100 will be poor quality, if you test a lot of these you may get lucky, but don’t waste your time.  On the other hand don’t buy the latest most expensive rod in the shop thinking it will be the best. Buy the best quality rod that fits your budget and try before you buy. Try casting a few different rods side by side if you can. Then pick one you like that also fits your budget.

Rod Action

Rod action is how manufacturers try to explain how a rod much a rod bends and how quickly it unbends during casting and fishing. Rod design is quite complicated, however in general, rods can be classified into 4 groups:

Action Flex Description
Fast Tip The top 1/4 of the rod bends, and the rod unbends very quickly at the end of the casting stroke. The rod can be hard to feel, but requires a shorter quicker casting stroke, which makes it easier to cast tighter, and faster loops.
Med Fast Tip/Mid The top 1/3 of the rod bends, and the rod unbends quickly at the end of the casting stroke. The rod has more feel, requires a slightly longer stroke, but tight fast loops are still possible.
Medium Mid The top 1/2 of the rod bends, and the rod unbends slower. The rod has even more feel, requires a longer stroke, loop speed is generally slower. Tight loops require better tracking, and control.
Slow Tip Generally the rod bends all the way through its length, and the rod unbends quite slowly. These rods have a lot of feel, but require very good timing and tracking to make good casting loops. It is easy to over power these rods and generate tailing loops.

For a beginner I  recommend Medium or Medium Fast action rods, as they generally easier to learn with.  Timing the cast is a lot easier, as they can be cast with a slower rhythm and thus provide the beginner with more time to control the cast.  They also provide more feel or feedback  through the grip. You will feel a more a progressive change in pressure through the grip as the rod bends and un-bends.

Timing and feel are important for control of the line and leader.  Mastering these will begin to give mastery over accuracy,  distance and presentation. A medium or medium fast action rod, will make this journey easier and quicker.  A bonus is that these rods are more relaxing to use.

Some people will recommend fast action rods, this is mainly because it is harder to over-power them , and hence harder to throw a tailing loop.  But these rods generally require better timing and lack feel.  These rods are best for distance casting or casting on windy days.

Slower action rods are often favoured by people who like gentle slow presentations, in still conditions. Perhaps small still-waters, or slow streams, where a gentle presentation is required. It takes a very experienced caster to cast these rods well in windy conditions or over long distances.  Beginners will usually throw tailing loops that end in a tangle.

Conclusion:

You are now a little better informed, so decide for what, where and how you will fly-fish, know your budget, and head to your local fly fishing store.  The staff will be able to advise you on some options.  Please try a few rods side by side before you make your purchase. Enjoy, smooth casts, and clean tight loops!


Five ways to hold a fly rod.

There are a lot of different ways to hold a fly rod, and it really doesn’t matter which one you adopt, as long as it is the right one for you. Most have pros and cons, but your grip should be relaxed and soft, and allow you to feel and control the rod. Here are five common grips to try out.

Thumb on Top – basic

IMG_2721

The simple grip is how you might hold a golf club or a cricket bat with ypur strong hand. Hold the cork with the palm to the side of the grip and the thumb on top. When casting the thumb stays on top and points in the direction of the cast.

Pros: This grip is simple and it makes it harder to over flex the wrist in the direction of the cast.

Cons: If the wrist is allowed to flex sideways, it can cause the back cast to be hooked behind the angler (poor tracking). This grip has less feel than the Thumb on Top index finger variation, especially on the back cast, and can sometimes lead to an overly tight grip.

Thumb on Top – Index finger variation.

IMG_2723

This is my personal preference, it is a variation of the Thumb-on-top grip, with the index finger crooked and extended further up the grip.  It is on the opposite side of the grip as the thumb and level or with it, or slightly higher up higher the grip. The rod should be held and controlled with the thumb and forefinger. The thumb should feel the pressure of the forward cast, and the index finger the pressure of the back cast. The remaining fingers should be loosely and passively curled around the grip.

Pros: This makes it harder to over flex the wrist, with the benefit of giving more feel, and lends itself to a softer grip.

Cons: If the wrist is allowed to flex sideways, it can cause the back cast to be hooked behind the angler (poor tracking).

Finger on Top

top

This grip is made with the palm and index finger top of the grip, with index finger extended in the direction of the rod tip. This grip is more often used by small stream and light rod enthusiasts.

Pros: it can aid accuracy, in that the finger can be pointed at the target on the presentation cast.

Cons: A downside of this grip is that it is very easy to over flex the wrist on the forward cast, and introduces too much or badly timed rotation. It also can put a lot of pressure on the index finger tendon, especially with heavier rods.

V-Grip

IMG_2727

This grip is made with the palm almost on top of the rod, but slightly rotated towards the side, with the index finger crooked underneath the rod.

Pros: This grip also provides good feel between the index finger and the thumb. It also helps with a crisper rotation at the end of the forward and back cast as it is more natural to snap the wrist this way.

Cons: However it can be a problem for those who want to over use the wrist( over rotation) or use it at the wrong time (loss of tension mid cast).

3 Point grip

IMG_2724

Attributed to Jason Borger, this is a variation of the V-grip. In this variation the Index finger is extended along the side of the grip, and the rod is held between thumb and middle finger. The remaining two fingers are curled lightly around the grip. This grip can feel strange to start, but advocates will tell you this soon passes.

Pros: This grip offers similar benefits to the V-grip, with the index finger providing stabilization, preventing unwanted sideways wrist flexion. It also provides good feel between the second finger and the thumb. It also helps with a crisper rotation at the end of the forward and back cast as it is more natural to snap the wrist this way.

Cons: This grip can be a problem for those who want to over use the wrist (over rotation) or use the wrist at the wrong time (loss of tension mid cast).

Summing up:

Some grips will have benefits over others, but the most important grip is one that is comfortable, relaxed and soft. A white knuckled tight grip will hinder your movement and line control, as well as being very tiring. Soft relaxed hands will help you feel the rod and thus control the loop’s form and shape. You only need to hold the rod with just enough force so that it does not slip from your hands. Try them out, you might find a new grip you prefer.

How to Cast in Fly Fishing

Fishing flies generally don’t weigh much, usually they aren’t much more than a piece of fluff, so how can we cast this far enough and accurately enough to catch a fish ? Casting in fly fishing can seem a lot harder than it looks. But if you can understand the basic dynamics of what makes a good cast and how to spot a bad one, you are well on your way to learning this art.

Fly Casting

The aim of fly-casting is to cast a very light weight fly far enough and accurately enough to catch a fish. If you would like to learn about this fine art, read on and then why not book a lesson or two, or join us on one of introductory courses.

How does it work?

In regular fishing, you rely on the lure or sinker having some weight to enable you to cast far enough, and the more weight there is the further you can cast. In fly-casting, however, we have a virtually weightless fly and no sinker to cast with. So how do fly fishers cast so far?

Casting is achieved because of the special Fly Line that is used. In fly fishing we tie the fly to some thin nylon (leader), which in turn is tied to a special thick fly fishing line (Fly Line). The Fly Line actually has enough weight of its own to help us cast. The weight of the fly line is distributed along its length, and the more fly line we have out the more weight we have to work with, however there is some skill and timing required to cast it successfully. If the line is stretched in a straight line, it is easy to cast, but if the line is not fully straight, it is very difficult. More on this important topic later.

How far do you need to cast?

Current world record for fly-casting your typical stream rod is now around 40m (130ft) or more. Most anglers cannot consistently cast further than about 20m, yet they have no trouble catching fish. More than 95% of trout are caught within 10m, and in small streams even closer. So all this should be good news to the new fly angler; an accurate cast within 5 metres is all that is required on a stream, and on a lake 10 -15m is more than enough.

Getting started

We start with the line laid out in front of us in a nice straight line, holding the line in our other hand, or trapping it against the rod with our finger. We use the rod to pull the line and speed it up, and then when we have the line moving at maximum speed, we need to stop the rod in a short space.  When the rod slows and stops, the line keeps going, passes the rod tip, and forms a loop. This loop keeps travelling and straightens out behind us. When the line has straightened out (and before it falls to the ground), we reverse the process and pull the line in the other direction, speeding it up, then stop the rod to make the line go forward.

The loop is the shape the line makes as it moves through the air. As the curved front of the loop moves through the air, it leaves behind line attached to the rod (rod leg) and pulls the line attached to the fly (fly leg) through the air. As the loop unrolls, the rod leg gets longer and fly leg gets shorter, until the line straightens out completely. This is when we need to cast the line in the opposite direction. We can make many different shaped loops, however some loops are more effective than others are.

This casting forwards and backwards in the air is called false casting. False casting is used to lengthen how much line we have in the air, in preparation for the presentation cast. To false cast, we must have enough speed in the loop, so that we can let some loose line slip through our fingers and shoot out as the loop is travelling away from us.

The presentation cast is the final cast where we place the fly on the water. For the basic presentation cast we let the line straighten out above the water, and then land gently. This means that we do not disturb the water too much or scare the fish.

Basic casting Dynamics.

We use the rod to move the line, and we need to get it moving fast enough so it will carry the fly to our target. There are two main ways we can use the rod to move the line: like a giant lever (rotation) using our wrist or elbow, or moving it back and forth without rotation(translation).

Rotation: This is the natural way most people start to cast by using the wrist or elbow.  In doing so the rod rotates through an angle and the length of the rod multiples the movement of our hand. So much so that the rod tip (and hence the line) can be moved ten times faster than by our hand alone. This is the easiest way to speed up the line, except the rod tip will follow a convex curve (see diagram), which in turn creates wide-open inefficient loops, sometimes they are so wide that they are not really loops.

Bigloop

Translation: If we cast by moving our hand back and forth in a straight line, without flexing our wrist or elbow and rotating the rod (this is quite an unnatural movement), we can move the line only as fast as we can move our hands. This moves the rod tip in a straight line, and helps create narrower loops; however, it is requires a lot of effort to obtain enough speed for any respectable distance.

To make a great cast, you need to combine both movements.  If you look at videos (try YouTube) of great casters, you will see they use both rotation and translation in their casting stroke.  However, the amount and timing of each may vary between casters according to their unique style. You will also see that the wrist flex is generally kept to a minimum and the rotation occurs late in the stroke. If you watch in slow motion, you will see that their hands generally move in a straight line and manage to keep the rod tip moving in a straight line. This is helped in part by the fact a rod bends as force is applied to it, and unbends at the end of the rotation near the end of the stroke.

Loop shapes and casting efficiency

Our aim is to make smooth efficient loops that do not tangle. A good loop has smooth straight rod and fly legs parallel to each other. By keeping the legs of the loop parallel, we prevent tangles and knots forming in the leader. Knots (wind knots) in the leader are not caused by wind, but are caused by tailing loops. A tailing loop occurs when the loop legs cross over, which usually creates a knot in the leader.

tailingloop

We refer to the distance between the fly legs as the width of the loop. If the rod legs are close together, we call this a narrow loop and far apart, we call it a wide loop.

An efficient loop will be relatively narrow, with both the rod and fly legs smooth, straight and parallel to each other.

Narrowloop

Why is a narrow loop more efficient? Imagine you have a ping-pong ball and a small stone that weigh exactly the same. Which one can you throw further? The stone of course, but why?.

Air resistance: the stone will go further because it has much less air resistance than a ping pong ball. The air resistance will slow the ping-pong ball more than the stone; as the ping-pong ball moves forward it needs to push more air out of the way than the stone, so slows down much more quickly. It is the same with loops. A narrow loop has to push less air out of the way than a wide loop, so is more efficient.

How to cast efficient loops?

Some simple principles govern casting and making smooth straight narrow loops.
1. Smooth acceleration of the rod tip will keep the loops smooth.
2. For straight loops, we need to accelerate the line in a straight line. The rod tip pulls the line to speed it up, and the line will follow in the direction that the rod tip pulls. If the rod tip travels in a straight line, the line will travel in a straight line.
3. To form the loop, there needs to be a defined deceleration, a defined stop of the rod at the end of each stroke will achieve this.
4. Keep the line under tension and wait until the line is straight. The line needs to be straight and tight before a cast in the other direction is made. This means waiting for the loop to unroll and straighten between each false cast. The longer the line you are casting, the longer you must wait.

Common mistakes to avoid:

1. Not Waiting (Pausing) Long enough:   Not allowing the loop enough time to unroll before commencing the cast in the opposite direction. This leads to wasting a lot of the available casting arc.  The casters instinctive reaction to this loss of efficiency, is to add more power, which can then lead to tailing loops.
2. Too much rotation at wrist or elbow: leading to big wide loops and non-loops. Catching the ground behind or in front. (Rod tip following a concave curve)
3. Waving the rod. No acceleration or deceleration, just moving the rod at the same speed. Leads to lack of distance and open loops.
4. Too much force for a short stroke. If you try to use too much force, or hurry up a rod over a too-short stroke, the rod will bend too much and the rod tip will dip too much in the middle of the stroke leading to a concave rod tip path (see tailing loop diagram above). This always results in a tailing loop and knots in the leader.  This usually happens when we try to go for a bit more distance, especially on the presentation cast,
5. Weak back cast. If the back cast is weak, the line will not straighten out behind, leading to a loss of tension, and an ineffective forward cast.  This is because a lot of the forward cast is used to straighten out the line behind, and there is no weight to pull on.

If you would like to learn this fine art, why not book a lesson or two, or join us on one of Introductory Courses.

Knots: the power of three.

There are hundreds of fishing knots out there, just do a google search and see. But how many do you really need to know?

There are hundreds of fishing knots out there, just do a google search and see. But how many do you really need to know?

Keep it simple and reliable: You really only need three knots when out fly-fishing.

Why only three?

There are three types of knots you need:

  1. To tie your tippet to the fly
  2. To tie your tippet to the leader (or repair your leader)
  3. To attach your leader to fly line.

Which three?

The three that have served me best over the years are:

  1. Clinch Knot – to tie tippet to fly
  2. Double blood knot – to connect tippet to leader
  3. Perfection Loop – for loop-to-loop leader to fly line connection.

Clinch Knot

This has to be the easiest knot to tie, and the first fishing knot I ever learned.   I use it to tie tippet to fly, or adding a dropper to the bend of a fly. The image below comes from: The Little Red Fishing Knot Book/Hemlock Printers Ltd. 2003

clinch

Do not forget to wet the knot (saliva works well), before tightening the knot. This prevents the heat from friction weakening the line when it is tightened.


Blood Knot

I use this knot for joining sections of tippet to leader, and for tying my own leaders. It is very strong when tied well. The following image can be found at the www.101knots.com web site. A useful resource for other knots.

How-to-Tie-a-Blood-Knot


Perfection Loop

The perfection loop , allegedly earns its name from the fact the loop remains inline with the leader, whereas other loops tend to stick out at an angle.  This knot is actually a bowline, a non-slip loop that has been used by sailors for years. The method for tying the loop below is my favourite way for tying it at the end of your leader. The following image can be found at the www.101knots.com web site. A useful resource for other knots.

How-to-Tie-a-Perfection-Loop

In conclusion:

There are other knots that you can learn for these applications, and you will find plenty of information via google.  It will include the virtues of one knot against another, which is more reliable, which has the best strength, etc. etc. (Some you could consider include: improved clinch knot, davy knot, lefty’s loop, surgeons loop, overhand loop.)  In my experience most knots are fairly close in strength if tied well. Any knot tied poorly will be weak.

You only need three knots you can rely on to not fail at the critical moment. To be reliable and strong, you need to tie them well, anywhere, in all conditions,  quickly and easily.  So decide on your three and  practice, practice, practice.


A simple nymphing set-up

Early season and the snow melt has my favourite mountain streams running hard and clear. It is still too cool for insects, and the trout aren’t really looking up for a feed.  They are lying deep, or hard against the undercut banks, keeping out of the heavy currents, but close enough to snack on all of the sub-aquatic nymphs caught in the heavy spring flows.

The fly fisher who persists with a dry-fly on these waters will eventually catch the odd trout, however the main game at this time of the year is the weighted nymph.  I prefer to keep things simple, and opt for a well weighted nymph below an indicator.

Recently whilst fishing with another angler, I was reminded how quick and easy the system I favour is to set-up and adjust while fishing.  They were faffing about with a gadget, tiny pieces of tube, bits of fluff and floatant for about ten minutes. In the same time, I rigged my rod, added the indicator, made a few casts and caught the first fish!

IMG_7407


How does it work?

Since I tie my own tapered leaders, I have handy knots spaced at 3, 4, 5, and 6 feet in depth. These act as handy stoppers for my indicators. This gives me plenty of choices for depth.

I use pre-treated bright yarn as my indicator, with a sliding loop to loop connection. This yarn comes pre-treated, and is highly water-resistant. The photos below show how to attach them. And how to move them.

One piece of yarn will easily support brass or small tungsten bead head nymphs, and two pieces will hold up the larger tungsten bead heads.  If you want to step it up, and use double heavy nymphs, you can use the same approach with big Tongariro style indicators.


Try for yourself

If you are sick of messing about with gadgets and floatant, and want to spend more time  time fishing, try it for yourself!

If you can’t be bothered making your own, or you aren’t confident in your knots, I have pre-tied nymph leaders, including 3 pieces of pre-treated yarn for sale in the store under leaders


Lessons ? Practise ? Why bother?

“Why bother with lessons and practise? I cast well enough to catch fish nearly every time I go out ?”. This was my response some 15 years ago, when a fishing mate suggested we share a lesson.  Proud of my skills back then,  I couldn’t see the sense in standing in a park making the same cast after cast, endlessly, monotonously.  Especially when I spent most of my time fishing streams and rivers.  My older wiser self, would now side with my mate on this one, and has a few answers to that question.  However I am not sure my younger self would have listened or understood.

I have no idea what his response was, but I remember being sceptical, and it was probably only the promise to go fishing afterwards that finally convinced me to join him.  I remember it was a very windy day, the coach was an experienced angler and had me working on getting rid of the tailing loops that annoyingly and reliably appeared every time I strived for distance. I still remember his sage advice (and his Sage advice), “try not to grip and rip, try to feel the cast”.  When I asked him how , he suggested I try a rod with a more forgiving action.  I tried his Sage SLT 5 weight, I loved it.  It did help, but I still didn’t understand how to develop feel. Also, whilst I am certain this was not his intention,  I took this to mean a new rod would make me cast better. It didn’t.  (Good rod though, glad I bought it, glad I still have it !). Sadly (for me), I didn’t pursue any more lessons with him or anyone else, and forgot about it for a while, enjoying myself nonetheless.

Why I finally took lessons

Five years on, and I was living in London,  trying to learn Italian, and on advice from my language teacher, I took to reading websites in Italian, on something that interested me (fly fishing unsurprisingly).  In this way, one spring day, whilst on vacation,  I found myself fishing on one of the rivers in Umbria in central Italy with some guys from the SIM Italian fishing association.  The river was fast and clear, and I had some great success fishing weighted nymphs.  One of my hosts suggested I try casting a dry near the far bank, where he claimed there were some big ones hiding under the overhanging shrubs.  I probably put at least 50 or more casts over there, landing the dry in the current seam, only to have it whipped away by the current.  At this point I declared, that :

  1. Clearly there were no fish there, and
  2. Even if they were there it was impossible to fish the spot, the drag was horrendous.

My host, didn’t seem fazed and made a leisurely cast across the current, his fly landed, and sat… and sat…. for at least a count of 3, before a sizeable hole opened up beneath it.  A relaxed lift of the rod, and the hook was set into the biggest fish I’d seen all day.  He did it twice more to prove it wasn’t a fluke.  He presented that dry-fly with studied precision, and injected just enough slack in the leader to let it hang enticingly in the still water. I begged him to tell me how he did it. Easy , he said, come to a course, and you can learn. Here was an art, and an art worth my learning (sorry for misquoting Mr Walton). I now had an  answer to that question of a few years before. Why take some lessons: to learn some skills to catch fish, good fish, that I otherwise couldn’t !

It was through the Italian SIM association I learned there was a whole lot more to fly-casting and fly fishing than laying a line out straight and accurately. Their approach to fly-casting is all about casts that catch fish, controlling the line, leader and fly to present the fly, in and around and under obstacles, combatting swirling currents to maximise the natural drift. Over the next few years I attended 6 or so courses, improving bit by bit, discovering the joy of playing around with rod and line.  Even more so on the river, where there is a lot of satisfaction to be had making a difficult cast, even better if a fish cooperates.  Another answer to my question : Have more fun!

How to Practise

None of this came without practising between the courses.  Not just any practice either, what is needed is focused practice. For example, when I was on a golfing crusade to earn a single figure handicap. I used to hit a bucket of balls at the driving range twice a week thinking this would really help, until a conversation with my golf-pro. He asked me how I practised, “I take my driver twice a week at the range” I said. “Hmm” he replied, “you drive quite well, but what about the rest of your game? Chips, putts ? fades ? draws ? High shots low shots ? Practise the shots you use most on the course. Spend half your time on your short game, half the rest on the short irons, and then rest on long irons and woods.” Good advice , practice the skills you need!

I advocate applying this approach to fly-casting. In the off-season I practise at least once a week for an hour or two at a time.  I make a rough plan for each session , I go with the intention of working on a four or five skills in particular. I break up my practice time and spend no more than 10 – 15 minutes on each skill.

Don’t be afraid to take a few lessons.  If you are in Melbourne we have casting lessons available. Click here.

Try it for yourself: you may catch more fish and may have more fun doing so!

Practise Drills for Fly Casting:

Loops and line control:

  1. Loop control : Try making false casts with consistent smooth loops. 3 or 4 casts then rest. Try doing this at different distances.
  2. Loop size: Practice casting tight loops, medium-sized loops, wide loops.
  3. Rod plane: try casting on various rod planes. from vertical, to horizontal and angles between. Concentrate on timing and making clean smooth loops.
  4. Double hauling.

Presentation Casts:

If you have learned how to do these, practice and perfect them, if not consider hitting me up for a lesson or three:

  1. Curved casts
  2. Wiggle casts
  3. Bucket Casts
  4. Aerial Mends

Accuracy:

  1. Simple accuracy I take a few hoops or targets with me, and set them up at various typical fishing distances, and practice a few casts at each , then try the next one, trying always to judge the distance by eye. I move around so the distance is never the same.  On the river you don’t know the distance in advance!
  2. Altering the plane: e.g. Side casting to a target, simulating casting low under overhanging foliage , yet still hitting the target.
  3. Presentation cast accuracy (curve, bucket, wiggle) : Using a hoop, I imagine that I need to make a presentation cast to some slack water, the loop is the target.
  4. Reverse cast (over your other shoulder)
  5. Other hand if you know how


On Water:

If you have suitable water nearby, try practising:

  1. Roll casts (and single-handed spey techniques )
  2. Mending
  3. Different presentations ( fly first, gentle)
  4. Different retrieve patterns (etc.)

Here are a couple of videos from my practice sessions

Autumn Challenges

As I watched the third bow wave for the morning disappear at the heavy tread of a wading boot behind me, I had to remember I was fishing with a beginner. . My companion for the day was more used to heel-first striding along the footpath in the urban landscape, and blissfully unaware of the noise he was making and the impact he was having. They are common mistakes we all make at times, that cost us the opportunity to catch our prey.

Moving on, I suggested that he should wait, and I would advance to the next pool and see if I could spot a fish. After a few minutes he should sneak up and join me. I tip-toed to the next pool, keeping low and against the bush, and watched a few moments before I found a tail waving gently over the gravel. (A tell tail sign perhaps?). I had been watching quietly for a few minutes, and was about to turn, when a quiet voice beside me asked, “Can you see anything?”. Nice sneaking I thought and replied, “Yep, don’t move! There is one in the middle”. “Just there” he said, as his arm sprang to point it out. Unsurprisingly our finny friend departed in a hurry at this too-sudden movement. Another lesson learned.

At the next stretch, we stood well back, and I pointed out the likely lie, and suggested a sneaky approach that would put him into casting distance. He slipped into position, taking his time, and dropped his fly onto the quiet water. It had barely drifted a foot before it was sipped down. A strike and a shout of joy, and we soon had it in the net. The highlight of a great day on the water, with new lessons for him, and good reminders for me.

Autumn stalking:

After a great summer, where a few weeks ago, the trout that were so focused on hoovering hoppers hard against the grassy banks and you could almost wade right up to them, it is easy to forget that autumn is a testing time, even for the stealthy angler. The trout are to be found in the quiet pools, supping on errant nymphs, or sipping on the trickle of duns that occasionally hatch in the still cool air of autumn air.

In summer, trout often sit the faster water, and it is easy to get close to them; movement is masked by the rough surface of such water, sound and pressure waves are muffled by the faster moving water, but in autumn stealth is mandatory.  Low clear water give the trout the upper hand.  They are afforded an excellent view of their surrounds, and are sensitive to any vibration or pressure wave that carries easily through the super-still water.

The following advice is not new, and is there in nearly every trout fishing book I have read. But we often neglect to heed it:

  • Tread lightly,
  • Avoid wading,
  • Move slowly, and keep a low profile.

Tread Lightly. I like to tip-toe along, walking on the balls of my feet, feeling for the ground, and letting the rest of my foot slowly descend till my foot is firmly on the ground.  You can practice at home with barefoot, sneaking around from room to room, although this may get you in trouble.  At one time I was practising this so much, it became a habit, people would accuse me of sneaking up on them!

Avoid Wading. On small streams, this is good advice at all times, as fish are sensitive to noises, vibrations and pressure waves. If you have to wade, stay out of the still slow water, fish from the faster water just below the tail of the pool. The advice from another author is to wade like a heron, given the disparate thickness of my legs and those of a heron, I could never make any sense of this. Perhaps the author himself had chicken legs. I suggest moving slowly as if walking through honey, almost slow motion, if you are making a bow wave or you create pressure waves your pace is too fast. Pressure waves will always lead you up the pool, and any trout will be long gone before you or your fly arrives.

Move slowly, keep a low profile. Trout are attuned to fast moving dangers from above (think birds of prey!), so will spook easily at fast movement, especially when silhouetted against a sky. Due to the physics of light bending at water surface, trout can see you quite easily. Check out the diagram below that I found on the net.

cone-of-vision

You can see, on level ground, that an average person can get within 10m without being seen, crouch down and you can get within 5 m or closer, especially if you have bush behind you and you are wearing drab clothes.

Enjoy the Autumn.  Light feet and tight Lines !

Hopper Fishing

February and March is one of my favourite times to fish in the meadow streams.  The hoppers are about, and they are a juicy high energy meal for a trout.  The trout hang close to the grassy banks an overhangs, waiting for the wind to blow a wayward hopper on to the water.

It is a dry fly fisher’s fantasy. The fish are looking up and a hopper plopping on the water is like the ringing of the dinner bell.  The trout slips quietly out from under the dark under cut, noses up under the struggling Orthoptera.

It is a great time for beginners and experts alike to be on the water. For the beginner it offers exciting visual fishing with plenty of opportunities to try to hook a trout.  Not too much finesse is needed with the presentation, in fact it is better to plop the fly down hard. For the expert, there is a chance to bag a big one, as the larger trout, usually more circumspect by day, are willing participants in the sport when hoppers are about.  To fool a trophy, demands accurate casts within inches of the bank, or under an undercut.

However it is only the most natural drift that will fool the wily older ones, so you need to get a drag free drift.  Many missed hookups, and refusals are as a result of drag, or micro drag, where the fly slips across the surface, instead of eddying and drifting with the micro-currents.

Hoppers come in many sizes and colours, it is good to have a few different patterns in your box, so you can match size and colour. I like simple foam hoppers in tan or green, with some rubber legs.

Sadly hopper fishing is fast coming to an end as I write this post, but soon the Autumn may fly hatches will begin.

%d bloggers like this: