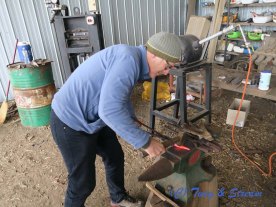
One freezing cold Saturday morning a few weeks back found me hammering at a glowing piece of steel on a large old anvil in a shed on a sheep farm near Ballarat. It was the first day of a knife making course with Australian knifemaker Adam Parker, who has been making knives for over 29 years.
My brother and I had chosen the 3 day course making “modern damascus” steel kitchen knives, this is a method of pattern welding that gives a similar patterned steel to the original Damascus steel. Steel smiths in the Persian city of Damascus made their famed blades from the 3rd until the 17th century. They sourced their steel “wootz” from somewhere in Pakistan, brought to Damascus along the old trade routes. Recent German analysis of old damascus steel shows it contains nanowires and carbon nano tubes and micro alloying elements. Some claim to have come close to making a matching steel but sadly the method of manufacture is lost in the mists of time.
Fortunately, Adam explains, we have plenty of great modern steels we can use, and he has chosen a mix of two, which when welded and forged would give us a very strong patterned blade.
Day 1. Steel Making
Before our arrival he had prepared some billets of steel, by alternating the two layers of chosen steel, spot welded on the edge to keep them together. Both types of steel contain sufficient carbon (as well as traces of other metals) to make them suitable for blades. The two types of steel will provide the contrasting colours in the final patterned blade.
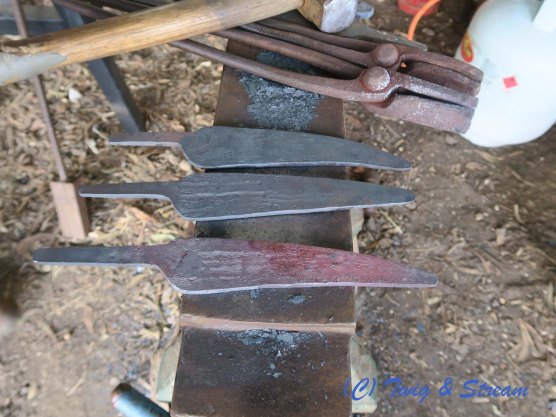
The billets are heated up in Adam’s home made gas forge until glowing, these are welded together using a hydraulic press. Adam controls the hydraulic press carefully to squeeze the metal together, and then returns it to the forge. He repeats the process, squeezing and lengthening the billet. Once it has reached the right size, Adam grinds all the scale off one side to reveal shiny steel. The bar is cut into two equal lengths and one is laid on-top of the other, newly ground faces together. A quick spot weld to ensure they don’t come apart. He heats it a little in the forge, and we sprinkle borax in the crack, then back in forge. The Borax melts and acts as flux filling the gaps and excluding air to ensure the next weld goes well. Doubling up the bar, doubles the layers of the steel and we spend the rest of the morning heating, welding , shaping and cutting and doubling the steel three more times. By then there are over 100 layers of steel. Adam lets us help, but ensures that their are no cracks, and the layers are welding together. By lunch time we have two grey lumps of steel. After lunch we heat the billets and begin to forge them roughly into shape. Adam lets us try for ourselves, explaining how to shape the tang, and then make a point. Hammering this steel into a knife shape is harder than it looks, and Adam quickly fixes all our mistakes with a few practiced blows of the hammer. Once the blades are roughly shaped Adam shows us how to make the patterns on the blades. He does this by drilling some shallow holes or cutting some shallow grooves on both sides of the steel. The steel is returned to the forge and heated, he then hammers the blades, flattening them, reducing the depth of the holes as the steel reforms. The final step of the day is a three step heating process to change the steel’s inner structure so it will be softer for the following days work. The first step is very hot, the blades glowing orange almost yellow, and removed from the forge to cool. Once Cool Adam evenly heats them to a cherry red before letting them cool. The final step is a dull rose colour.Day 2 – Shaping , Grinding, Hardening
In the work shop. Adam uses the grinder to shape our blades, cutting off the rough edges giving them the final knife shape: removing excess from the back of the knife, cutting and curving the edge and squaring up the tang. We use the file to tidy up around the edges. Adam then ensures the blades are straight, ready for the next step. He uses some die on blade edge, and then scratches a mark in the middle, showing where the edge will be.
Adam sets up my blade on his jig and shows me how to bevel the blade. I need to remove some meat from the knife so it tapers from 3m thick at the back down to about 1 mm at the edge. This where Adam’s 29 years of experience and the jigs he has developed, makes this a a little easier for us. All we need is a steady smooth hand to pass it back and forward on the grinder. Adam regularly adjusts the tilt of the jig, and we progressively bevel the blade. To make sure we don’t mess it up, Adam completes the delicate process. Next is hardening the blade. Heating them to an exact temperature and quenching in oil evenly is a practiced skill so Adam does this carefully, making sure not to drop the blades. This makes the knifes very hard (too hard) so Adam tempers them for a few hours in the oven to soften them off a couple of Rockwell points. While this happening we select the wood for our handles. Adam marks them up and then cuts them roughly to shape on the band saw.Day 3 – Polishing, handles and sharpening
In the morning our fist job is to remove all the scratches left by the grinder, polishing up the blade. Once polished it is into the acid for an etch to bring out the patterns.While that is happening, Adam prepares the metal guards, routing a slot for the tang. I chose stainless to match blade, my brother chose brass for his. Out of the acid and the blades look good, they get a final treatment in Adams secret ingredient (instant coffee) which helps set the black colours.

We mount the blades into their rough handles, gluing them with epoxy. Letting it dry over lunch. Adam drills the handles and knocks in a small pin. After shaping the handles on the grinder, a final polish with sandpaper, and some oil and a buff. Knives are sharpened till they can slice tissue paper.
The knives are looking great at the end, which is all down to Adam, and his skills, but at least we helped a bit like good apprentices. We had a heap of fun and would like to try again, next time I reckon I’d like to try making a fishing knife! Adam runs 1, 2 and 3 day courses. Students participate in the knife making as much as they desire and their skills allow. You can find Adam Parker on Instagram @AdamParkerKnives and Facebook.


